A chimney cap usually gets attention only after something goes wrong. Rain starts getting into the flue. Birds build a nest where they should not. Wind pushes smoke back down. Once that happens, homeowners want to know what the chimney cap installation process actually involves and whether it is a quick add-on or a job that needs a trained chimney professional.
The short answer is that a chimney cap is a small component with a big job. It helps keep water, animals, debris, and downdrafts from causing expensive chimney problems. But getting the right result depends on more than fastening metal to the top of a chimney. The size has to be right, the mounting method has to match the chimney design, and the installer has to pay attention to the condition of the crown, flue tile, and surrounding masonry.
What a chimney cap is really supposed to do
A chimney cap sits at the top of the flue opening and acts as a protective cover. Most include a solid top, a mesh screen around the sides, and a base that attaches to the flue or chimney top. That simple design handles several problems at once.
First, it helps keep water out. That matters because chimneys take direct exposure from rain, snow, freeze-thaw cycles, and wind-driven storms. Water that enters through an open flue can damage liners, rust metal components, weaken masonry, and create staining indoors. Second, it blocks animals and debris. Leaves, twigs, and nests can restrict airflow and create a fire hazard. Third, a properly selected cap can help reduce downdrafts and keep sparks and embers better contained.
Not every chimney uses the same cap style, though. A single-flue masonry chimney often takes a different cap than a multi-flue setup or a factory-built chimney system. That is why measuring and matching are a real part of the job, not an afterthought.
The chimney cap installation process step by step
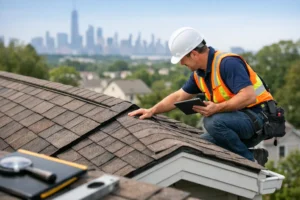
The chimney cap installation process usually starts with inspection, not installation. Before any cap is selected, the top of the chimney should be checked for cracked flue tiles, a damaged crown, loose brickwork, missing mortar joints, and signs of water entry. If the chimney top is already failing, putting a new cap on it does not solve the underlying problem. In some cases, it can even hide it for a while.
Once the condition is known, the flue is measured carefully. For a standard flue-mounted cap, the installer measures the outside dimensions of the clay tile or metal flue. For a top-mount cap that covers the full chimney crown, the full top dimensions matter. Even a small sizing mistake can lead to a loose fit, poor draft performance, or gaps that still allow water and animals in.
After measurements are confirmed, the installer selects the cap material and style. Stainless steel is a common long-term choice because it holds up well against corrosion and weather. Galvanized steel may cost less up front, but it usually does not last as long. Copper can be attractive and durable, but it is often chosen more for appearance and comes at a higher price. The right choice depends on budget, exposure, and how long the homeowner wants the cap to last.
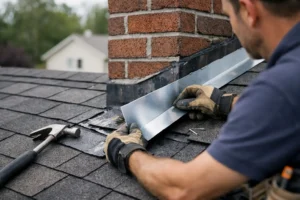
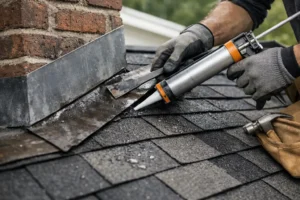
Installation itself depends on the cap type. A flue-mounted cap is usually secured to the flue tile with tightening bolts or screws built into the cap base. The fit needs to be snug and level without placing damaging pressure on a brittle clay tile. A top-mount cap is attached across the chimney crown or chase top and sealed at the base with appropriate fasteners and sealant. That style can offer broader coverage, but only if the mounting surface is solid.
The final part of the job is checking stability and airflow. A cap should be firmly secured, properly centered, and free of any obstruction that could interfere with venting. If there are drafting issues, the installer may need to look deeper at flue size, chimney height, or other venting conditions rather than assuming the cap alone will fix everything.
Why proper fit matters more than homeowners expect
A lot of chimney problems come from parts that were almost right. A cap that is slightly undersized may shift in high wind. One that is oversized may not seal out driven rain the way it should. Mesh that is too tight can create venting issues for certain appliances, while mesh that is damaged or too open may not stop nesting animals.
This is also where do-it-yourself work becomes risky. On paper, a chimney cap can look simple to install. In reality, roof pitch, chimney height, fall risk, hidden masonry damage, and venting requirements make the job less straightforward than it appears. What seems like a basic weekend repair can turn into a broken flue tile, an unstable ladder setup, or a cap that traps moisture and creates bigger repair bills later.
For homeowners in New Jersey, weather is another reason fit and installation quality matter. Wind, coastal moisture in some areas, snow, and freeze-thaw cycles put constant stress on exposed chimney components. A cap has to do more than sit in place. It has to hold up season after season.
Common issues found during chimney cap installation
It is not unusual for a cap appointment to reveal other chimney problems. A cracked crown is one of the most common. Since the crown sheds water away from the flue opening, damage there can allow moisture to seep into the masonry structure. If the crown is deteriorated, installing a new cap without addressing the crown is only part of the solution.
Installers also find broken or spalled flue tiles, loose top-course bricks, rusted chase covers on prefabricated systems, and evidence of previous water intrusion. Sometimes the old cap was missing. Other times it was the wrong size, loosely attached, or rusted through.
There are also situations where animal nesting has already caused blockage. In that case, the chimney may need cleaning before a new cap goes on. If creosote buildup is present, that should be handled first as well. Installing a cap on a chimney that has not been properly checked can leave a serious safety issue in place.
How long installation takes and what can affect cost
In many cases, chimney cap installation is a relatively short job once the right cap is on site and the chimney top is in good condition. A straightforward replacement may take well under a couple of hours. A more involved project, especially one that includes crown repair, masonry work, liner concerns, or a custom cap, can take longer.
Cost depends on the size and type of cap, the material selected, roof access, chimney height, and whether repairs are needed first. That is why a real estimate matters. A low quote for a basic cap may not include fixing the actual cause of water entry or venting trouble. On the other hand, not every chimney needs a premium custom solution. The best approach is a clear inspection and a recommendation that fits the chimney, not a one-size-fits-all sales pitch.
When to replace a chimney cap instead of repairing around it
If a cap is rusted, bent, loose, or pulling away from its mounting points, replacement is usually the smarter move. The same is true if the screen is broken or the top is no longer shedding water properly. Minor surrounding repairs can still be worthwhile, but an aging cap that has already failed often does not justify patchwork.
Homeowners should also think about replacement if they have repeated animal entry, ongoing moisture problems, or visible staining around the chimney. Those symptoms do not always mean the cap is the only issue, but they are strong signs that the top of the chimney needs attention.
A dependable contractor will usually look at the whole system. That includes the cap, crown, flashing, masonry, liner condition, and any signs of leaking or smoke performance problems. That kind of inspection is often what separates a temporary fix from a lasting one.
Choosing the right contractor for the job
The best chimney cap installation process is one that starts with safety and ends with confidence. Homeowners should look for a contractor who works on chimneys regularly, explains what they found, measures correctly, and gives a clear estimate before work begins. Insurance, experience, and a willingness to address related chimney-top issues matter just as much as the cap itself.
At Adore Construction, that practical approach is the point. Homeowners do not need a hard sell. They need someone who can get up there safely, identify what is happening, and install the right protection without cutting corners.
If your chimney is uncovered, leaking, or showing signs of wear at the top, the smartest next step is not to wait for the next storm. A properly installed cap is a small repair compared to the cost of water damage, blocked venting, or masonry deterioration.